Hanging a deer mount can seem challenging. But with the right steps, it’s easy.
This guide will help you display your trophy proudly. Deer mounts are cherished by hunters. They serve as memories of successful hunts and enhance room decor. Hanging a mount correctly ensures it stays secure and looks great. Whether you’re new to this or looking for a refresher, you’ll find useful tips here.
From choosing the right wall space to securing the mount, every step matters. This blog will guide you through the process, making it simple and enjoyable. Ready to showcase your deer mount? Let’s get started!

Credit: www.amazon.com
Choosing The Right Location
Choosing the right location for your deer mount is crucial. The perfect spot will showcase your trophy and complement your room’s decor. Consider these tips to find the ideal place for your mount.
Consider Room Size
The size of the room matters. A large deer mount can overwhelm a small space. Ensure the mount fits well with the room’s dimensions. Take measurements before deciding on a spot. A well-balanced display enhances the overall look.
Avoid Direct Sunlight
Direct sunlight can damage your deer mount over time. UV rays cause fading and deterioration. Place your mount away from windows and strong light sources. Indirect light is better for preserving its condition. Consider using curtains or blinds for additional protection.
Credit: www.youtube.com
Preparing The Wall
Before hanging your deer mount, it’s crucial to prepare the wall properly. A secure wall will ensure your trophy remains in place. This guide will walk you through the steps needed to prepare your wall, making the process easier and safer.
Find The Studs
Finding the studs in your wall is essential for stability. Use a stud finder to locate the studs. This tool will help you identify the solid parts of the wall. Mark the locations of the studs with a pencil.
Studs are usually 16 inches apart. Knowing their exact location will allow you to anchor your mount securely. If the mount is heavy, securing it to a stud is crucial.
Mark The Spot
Once you find the studs, mark the exact spot for your deer mount. Use a pencil to mark where the top of the mount will be. It’s helpful to measure the height from the floor to ensure it’s at an eye-catching level.
Also, ensure the mount is centered and level. You can use a level tool for precision. Marking the spot accurately will make the mounting process smoother.
Double-check your marks before drilling or screwing anything into the wall. This step ensures everything is in place and aligned correctly.
Selecting Mounting Hardware
Choosing the right hardware for your deer mount is crucial. Proper mounting ensures your deer mount stays secure and looks great for years. Here are some tips to help you select the best mounting hardware.
Types Of Mounts
There are several types of mounts to consider. Each offers unique benefits:
- Wall mounts: These are the most common. They are easy to install and allow you to hang your deer mount on any wall.
- Pedestal mounts: These mounts allow you to place your deer mount on a stand. This is great for floor display.
- Corner mounts: These mounts are designed for corner spaces. They maximize room use.
Weight Considerations
The weight of your deer mount is important. Heavier mounts need stronger hardware. Here’s a simple guide:
| Mount Weight | Recommended Hardware |
|---|---|
| Up to 10 lbs | Standard screws and anchors |
| 10 – 25 lbs | Heavy-duty screws and wall anchors |
| Over 25 lbs | Stud-mounted hardware |
Always use hardware rated for your mount’s weight. This ensures safety and stability. Check your wall type (drywall, plaster, wood) before choosing hardware.
Measuring And Marking
Hanging a deer mount requires precise measurements and accurate markings. This ensures your mount is displayed perfectly. Follow these steps for a flawless presentation.
Height Placement
First, decide the height at which you want to hang your deer mount. The ideal placement is at eye level. This means the center of the mount should be around 60 inches from the floor. This height allows viewers to admire the mount comfortably.
Spacing Guidelines
Next, consider the spacing around your deer mount. Ensure there is ample space on all sides. This prevents the mount from appearing cramped. Here are some guidelines for spacing:
- Side Clearance: Leave at least 24 inches on either side.
- Top Clearance: Ensure 12 inches of space above the mount.
- Bottom Clearance: Maintain at least 24 inches below the mount.
These measurements ensure your deer mount stands out.
Installing The Mount
Installing the Mount is a crucial step in showcasing your prized deer. It involves precision and attention to detail. Let’s break it down into manageable steps to ensure your mount is secure and looks great on your wall.
Drilling Holes
First, gather your tools. You will need a drill, a stud finder, and a level. Use the stud finder to locate the wall studs. Mark the spots where you will drill.
Next, hold the bracket against the wall. Make sure it is level. Mark the screw holes with a pencil. This will guide your drilling. Now, drill the holes where you marked. Be careful to keep the drill steady and straight.
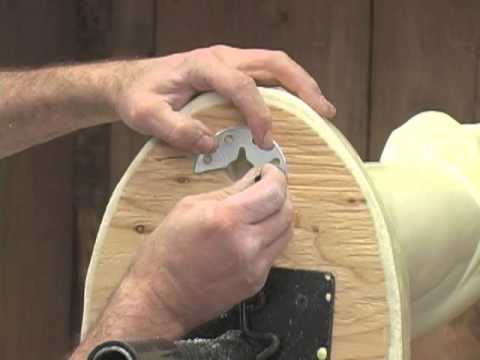
Securing The Bracket
Place the bracket over the drilled holes. Insert the screws into the holes and start tightening them. Ensure the bracket is snug against the wall. This will provide strong support for your mount.
Once the bracket is secure, it’s time to hang the deer mount. Lift the mount and align it with the bracket. Carefully slide it into place. Make sure it is stable and properly aligned.
By following these steps, you will ensure your deer mount is securely and attractively displayed on your wall.
Hanging The Deer Mount
Hanging a deer mount can be a proud moment for any hunter. It is a way to celebrate your achievement and display it for everyone to see. But, ensuring it is hung correctly is crucial. Let’s dive into the steps for hanging your deer mount.
Lifting Safely
Lifting a deer mount can be challenging due to its weight and size. Before lifting, ensure you have a firm grip. Use both hands and bend your knees, not your back. This method will protect your back from strain. If the mount is too heavy, ask a friend to help. Never try lifting it alone if you feel it is too heavy. Safety should always be your priority.
Balancing The Mount
Once you have lifted the mount, it is time to balance it. Hold the mount against the wall where you want to hang it. Adjust its position until it looks level and balanced. Mark the spot with a pencil. Use a level to ensure it is perfectly straight. A balanced mount not only looks better but is also less likely to fall. Take your time with this step. It is essential for the perfect display.
Final Adjustments
After mounting your deer, you need to make final adjustments. These steps ensure your mount looks its best. Two key tasks are leveling the mount and ensuring stability.
Leveling The Mount
First, check if the mount is level. Use a small level tool for accuracy. Place the level on top of the mount. Adjust until the bubble is centered. This step avoids a tilted appearance. A leveled mount looks professional and balanced.
Ensuring Stability
Next, ensure the mount is stable. Gently push the mount from different angles. It should not wobble. If it does, tighten the screws or bolts. You may need to add extra support. Use wall anchors for better stability. A stable mount prevents accidents and keeps your trophy secure.
Maintenance Tips
Proper maintenance is essential to keep your deer mount looking pristine. Regular care ensures your mount remains a striking centerpiece. Below are some crucial maintenance tips to help you keep your deer mount in top condition.
Regular Dusting
Dust can accumulate on your deer mount over time. Use a soft, dry cloth to gently wipe the surface. Avoid using water or chemicals as they can damage the mount. For hard-to-reach areas, a soft-bristled brush works well. Regular dusting keeps the mount clean and maintains its natural look.
Inspecting For Damage
Periodically inspect your deer mount for any signs of damage. Look for cracks, discoloration, or loose parts. A thorough inspection helps you catch any issues early. Address any damage promptly to prevent further deterioration. Use a flashlight to check the areas around the eyes, nose, and ears for any signs of wear.

Credit: www.reddit.com
Frequently Asked Questions
How High Should A Deer Mount Be Hung?
A deer mount should be hung at eye level, around 5-6 feet high.
What Tools Do I Need To Hang A Deer Mount?
You need a stud finder, drill, screws, and a level to hang a deer mount.
Can I Hang A Deer Mount On Drywall?
Yes, but use anchors or find a stud to ensure it is secure.
How Do I Find A Stud To Hang My Deer Mount?
Use a stud finder to locate a stud in the wall for secure mounting.
How Much Weight Can A Deer Mount Hold?
Most deer mounts weigh between 10-20 pounds; ensure your mount and wall can support this weight.
Conclusion
Hanging a deer mount can be straightforward with the right steps. Make sure your mount is secure and level. Use strong anchors for stability. Measure carefully to achieve the perfect height. Your trophy will be a great conversation piece. Display it proudly in your space.
Enjoy the sense of accomplishment and the memories it represents. Happy mounting!