Mounting deer antlers without the skull is a unique way to display your hunting trophies. It’s an easy, attractive option for showcasing antlers in your home.
Deer antlers can make beautiful wall decorations. They can remind you of a successful hunt or just add a rustic touch to your decor. Many people want to mount antlers without the skull for a cleaner look. This method keeps the focus on the antlers themselves.
It’s also a practical choice when only the antlers are available. In this guide, we’ll explore how to do it properly. Whether you’re a seasoned hunter or a beginner, you can create a stunning display. Let’s dive into the process and discover the best techniques for mounting deer antlers without the skull.
Materials Needed
Mounting deer antlers without a skull is a rewarding project. To do it right, you need the proper materials. This section covers everything you need for this task. Let’s break it down into tools, equipment, and safety gear.
Tools And Equipment
Gathering the right tools and equipment is essential. Here is a list of what you’ll need:
- Antler Mounting Kit: Includes a plaque, screws, and mounting hardware.
- Electric Drill: To create holes for mounting screws.
- Screwdriver: For securing screws into the plaque.
- Measuring Tape: Ensures precise placement of the antlers.
- Handsaw: To trim the antlers if necessary.
- Sandpaper: Smooths any rough edges on the antlers.
- Wood Glue: Provides extra hold between the antlers and the plaque.
- Paint or Stain: For finishing the plaque.
Safety Gear
Safety is crucial when working with tools. Make sure you have the following safety gear:
- Safety Glasses: Protects your eyes from debris and dust.
- Work Gloves: Keeps your hands safe from cuts and splinters.
- Dust Mask: Prevents inhalation of sawdust and particles.
- Ear Protection: Shields your ears from loud drilling noises.
Using the right materials ensures a smooth and safe project. Always prioritize safety and accuracy. Happy mounting!
Preparing The Antlers
Mounting deer antlers without the skull can be a rewarding project. It requires careful preparation to achieve a professional look. Properly preparing the antlers ensures they are clean, smooth, and ready for display. This involves cleaning, sanding, and smoothing the antlers.
Cleaning The Antlers
Start by cleaning the antlers thoroughly. Remove any dirt, debris, or leftover tissue. You can use a brush and soapy water for this task. Scrub the antlers gently to avoid damaging them. Rinse the antlers with clean water and let them dry completely.
To remove any grease or oil, wipe the antlers with a cloth soaked in denatured alcohol. This step ensures the antlers are free of any residues. Clean antlers will take finish or paint better.
Sanding And Smoothing
Once the antlers are clean and dry, it’s time to sand them. Use fine-grit sandpaper to smooth any rough spots. Sanding helps to remove any imperfections and prepares the surface for further treatment.
- Begin with a 120-grit sandpaper.
- Sand in the direction of the antler’s growth.
- Finish with a 220-grit sandpaper for a smoother surface.
After sanding, wipe the antlers with a damp cloth to remove any dust. Inspect the antlers for any remaining rough spots and sand them again if necessary. This step ensures the antlers are smooth and ready for mounting.
Proper preparation of the antlers is crucial. Clean and smooth antlers not only look better but also last longer. Take your time with these steps to achieve the best results.
Choosing A Mounting Method
Mounting deer antlers without a skull can be a rewarding project. Choosing the right method ensures your display looks professional and fits your decor. Here, we explore two popular methods: plaque mounting and direct wall mounting.
Plaque Mounting
Plaque mounting is a classic and elegant choice. It involves attaching the antlers to a wooden plaque. Here’s how to do it:
- Choose a Plaque: Select a plaque that suits the size of your antlers. Wood types like oak or walnut are durable and attractive.
- Position the Antlers: Place the antlers on the plaque. Ensure they are centered and balanced.
- Secure the Antlers: Use screws or bolts to attach the antlers. Ensure they are tight and stable.
Plaque mounting offers a neat and tidy look. It is perfect for traditional or rustic interiors.
Direct Wall Mounting
Direct wall mounting is a modern and minimalist option. It involves attaching the antlers directly to the wall. Follow these steps:
- Locate Wall Studs: Find the studs in your wall. Use a stud finder for accuracy.
- Mark the Position: Mark where you want to mount the antlers. Ensure it is at eye level.
- Attach the Antlers: Use heavy-duty screws or brackets. Secure the antlers firmly to the wall.
This method highlights the natural beauty of the antlers. It suits modern or minimalist decor styles.

Credit: www.wikihow.com
Creating A Mounting Base
Creating a mounting base for your deer antlers without the skull can be a fun and rewarding project. A well-crafted base not only supports the antlers but also enhances their display. This guide will help you select, cut, and shape the perfect base.
Selecting The Base Material
The first step is to choose a material for the base. Wood is a popular choice due to its durability and natural look. Oak, pine, and walnut are great options. You can also use metal or plastic, but they may not look as traditional.
Consider the room where you will display the antlers. Match the base material to the room’s décor. This will help create a cohesive look. The size of the base is also important. It needs to support the antlers without being too big or too small.
Cutting And Shaping The Base
Once you have your material, it’s time to cut and shape the base. Draw a shape on the material that complements the antlers. A simple oval or rectangle works well. Use a saw to cut out the shape carefully. Sand the edges smooth to prevent splinters.
Next, drill holes for mounting the antlers. Measure the antlers and mark where the screws will go. Make sure the holes are evenly spaced. This will ensure the antlers are level when mounted. Finally, finish the base with stain or paint. Let it dry completely before mounting the antlers.
Attaching The Antlers
Mounting deer antlers without the skull can be a rewarding project. It adds a rustic touch to your home decor. You can proudly display your hunting achievement. Let’s break down the process into simple steps. First, we’ll drill holes. Then, we’ll secure the antlers with screws.
Drilling Holes
Start by marking the points where you will drill. These points should align with the base of the antlers. Ensure the marks are evenly spaced. Use a power drill with a bit that matches the size of your screws. Drill slowly to avoid splitting the antlers. Hold the antlers steady while drilling. This step is crucial for a strong mount.
Securing With Screws
Now that the holes are drilled, it’s time to attach the antlers. Place the antlers against the mounting surface. Ensure they are positioned correctly. Insert the screws into the drilled holes. Tighten them securely. The antlers should feel firm and stable. Check for any wobbling or movement. Adjust the screws if needed. Your antlers are now securely attached.
Finishing Touches
The finishing touches can transform your deer antler mount from ordinary to extraordinary. This section covers how to enhance the base and add decorative elements. These steps ensure your antlers look stylish and well-displayed. Let’s dive into the final steps.
Painting Or Staining The Base
Painting or staining the base adds a polished look. Choose a color that complements the antlers and your home decor. Here are the steps:
- Prepare the surface: Sand the base to smooth any rough spots.
- Apply primer: Use a primer if you plan to paint. It helps the paint adhere better.
- Choose your finish: Select a paint or stain. Stains highlight the wood’s natural grain. Paint offers a solid, uniform color.
- Apply the finish: Use a brush or cloth. Follow the wood grain for a smooth finish.
- Let it dry: Allow the finish to dry completely. This can take several hours or overnight.
- Seal the base: Add a clear sealant to protect the finish and give it a glossy look.
Adding Decorative Elements
Decorative elements can personalize your mount. Here are a few ideas:
- Engraved plaque: Attach an engraved plaque with the date and location of the hunt.
- Natural accents: Add moss, small branches, or stones around the base for a rustic look.
- Leather or fabric: Wrap the base in leather or fabric for a unique texture.
- Lighting: Install small LED lights to highlight the antlers. This works well in dimly lit rooms.
These finishing touches make your deer antler mount a standout piece. They add character and ensure your display is truly unique.
Mounting On The Wall
Mounting deer antlers without a skull can be an elegant way to display your trophy. The process is straightforward and requires only a few tools. This guide will help you mount deer antlers on your wall with ease.
Finding The Right Spot
First, choose a visible spot. The living room or study can be ideal. Ensure there’s enough space around for a balanced look. Light sources should highlight the antlers without causing shadows.
Using Wall Anchors
Wall anchors provide firm support. They prevent the antlers from falling. Start by marking the spot with a pencil. Drill a hole for the anchor. Insert the anchor into the hole. Then, screw it into place. The antlers will be secure and stable.
Finally, hang the antlers. Ensure they are level. Use a spirit level if needed. Admire your mounted antlers. They will look great on the wall.

Credit: www.youtube.com
Maintaining Your Mounted Antlers
Maintaining your mounted antlers is crucial for their longevity and appearance. Proper care ensures they remain a stunning feature in your space for years. Let’s explore how to keep your mounted deer antlers in top condition.
Regular Cleaning
Dust and dirt can accumulate on your mounted antlers. Clean them regularly to keep them looking their best.
- Use a soft cloth or feather duster to remove dust.
- Gently wipe the antlers with a damp cloth.
- Dry them with a soft towel to avoid water spots.
Inspection For Damage
Regular inspection of your mounted antlers helps identify potential issues early. This can prevent further damage.
- Check for any cracks or splits in the antlers.
- Ensure the mounting hardware is secure and stable.
- Look for signs of insects or pests.
If you find any damage, take action immediately. Repairing small issues can prevent larger problems.
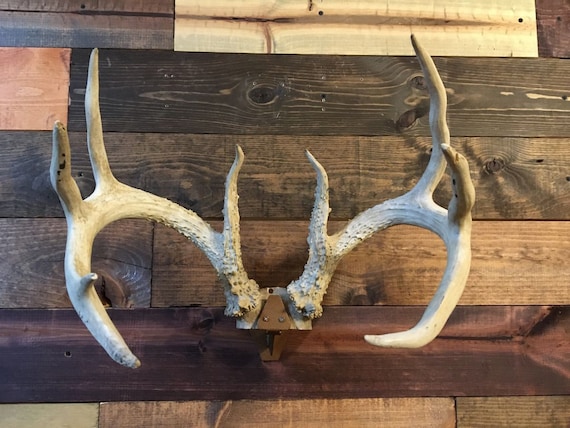
Credit: www.etsy.com
Frequently Asked Questions
What Tools Are Needed To Mount Deer Antlers?
You need a saw, screws, drill, and a mounting plaque.
How Do I Prepare The Antlers For Mounting?
Clean the antlers. Remove any debris or tissue. Ensure they’re dry.
Can I Mount Deer Antlers Without Professional Help?
Yes, you can. Follow simple steps and use basic tools.
How Do I Attach Antlers To A Plaque?
Drill holes in the base of antlers. Screw them onto the plaque securely.
Are There Alternatives To A Wooden Plaque?
Yes, you can use metal, resin, or custom-designed mounts.
Conclusion
Mounting deer antlers without a skull can be simple and rewarding. Follow the steps and use the right tools. Your display will look professional and impressive. Keep your antlers clean and secure. Enjoy showcasing your hard-earned trophies. Share this knowledge with friends and family.
They’ll appreciate your skills and creativity. Happy mounting!