The best carry spot balances safety, comfort, access, and concealment for you.
You want a clear, trusted path through a crowded topic. This complete guide to concealed carry positions cuts through noise with tested advice, simple steps, and honest lessons I learned teaching new carriers and refining my own habits. If you want a complete guide to concealed carry positions that is practical, safe, and easy to apply, you are in the right place. Stick with me, and by the end of this complete guide to concealed carry positions you will know what works for your body, lifestyle, and skill level.
How to choose the right concealed carry position
A good position does three things well: it keeps the gun secure, keeps it hidden, and lets you reach it fast under stress. This complete guide to concealed carry positions starts with a simple system you can do today.
- Start with safety. Pick a rigid holster that fully covers the trigger and stays open for safe reholstering.
- Check concealment. Wear normal clothes and walk, sit, bend, and hug. Watch for printing or the outline showing.
- Test access. Practice the draw with an unloaded gun or a training gun. You should reach it with one hand.
- Demand comfort. If it pokes, pinches, or rubs, you will not carry it daily.
- Be consistent. Carry in the same place most of the time. Skill builds from repetition.
I teach new carriers to score each position 1–5 for safety, access, concealment, and comfort. Total the scores. The top spot wins a two-week trial at home before you commit in public.
The main concealed carry positions explained
This complete guide to concealed carry positions covers the most common spots, with plain pros and cons. Match each to your body, wardrobe, and daily life.
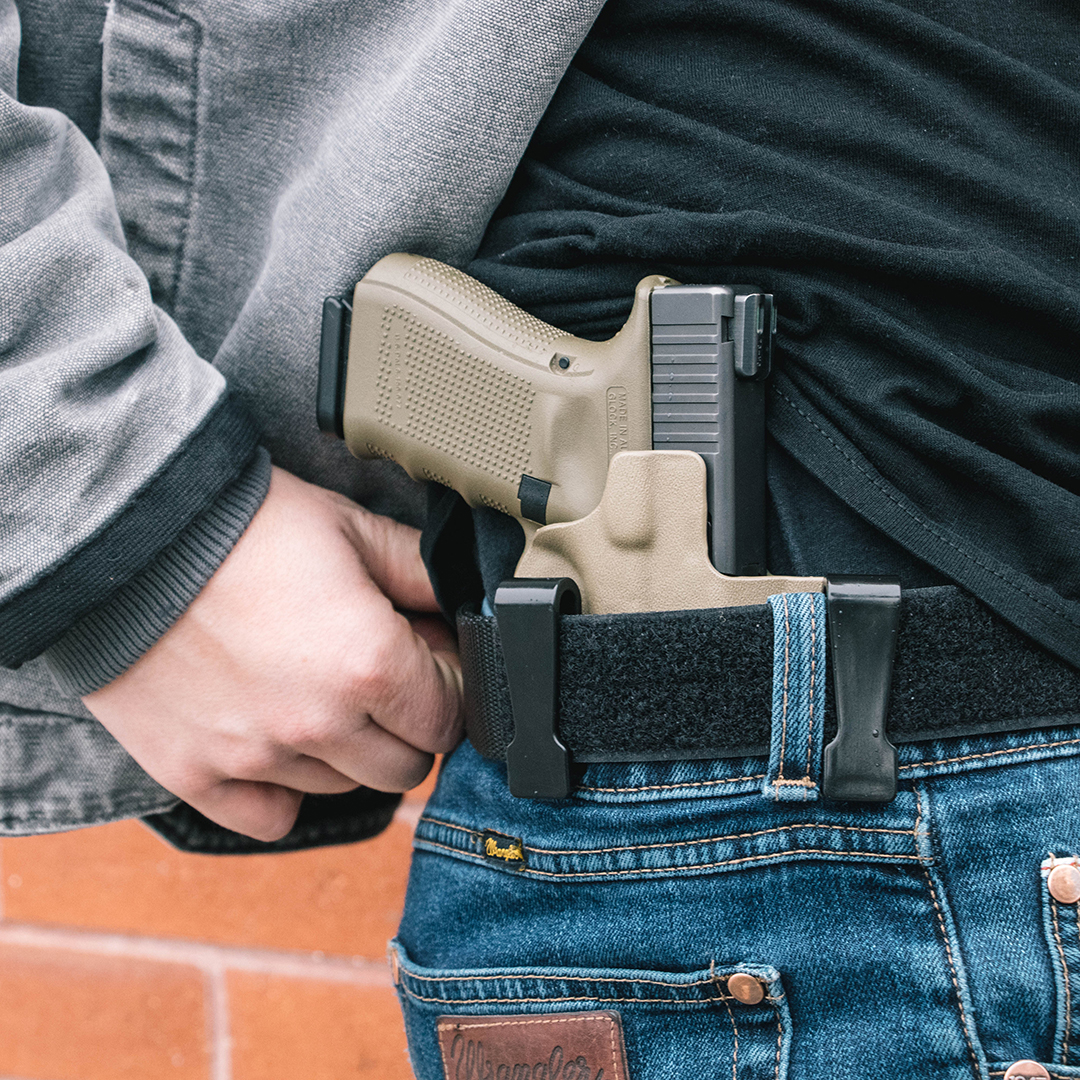
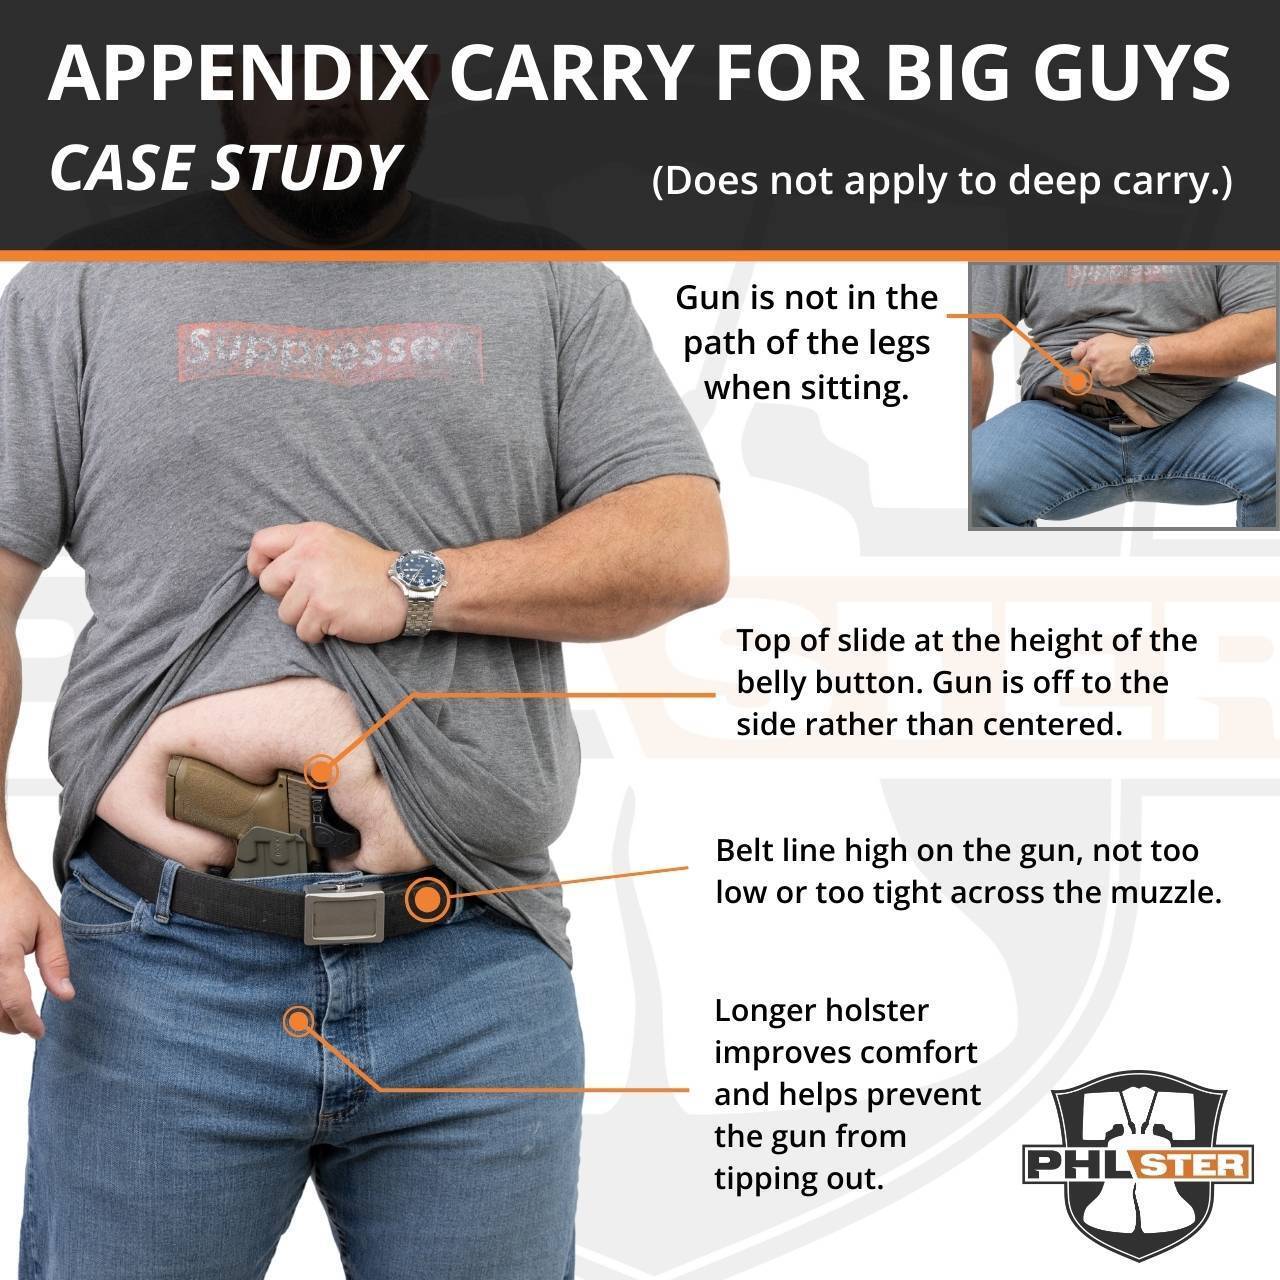
Appendix Inside the Waistband (AIWB, around 12:30–2:00)
Best for quick access and strong concealment with the right holster.
- Pros: Fast draw, easy to guard in crowds, great for seated access.
- Cons: Can poke when bending; needs careful reholstering and solid holster.
- Tips: Use a wedge and a claw to tuck the grip. Reholster slow and mindful.
Strong-Side IWB (3:00–5:00 right-handed, 7:00–9:00 left-handed)
A classic choice many find simple and safe.
- Pros: Good concealment, many holster options, easy to live with.
- Cons: Slower while seated, tight shirts may print at the grip.
- Tips: Adjust cant angle and ride height to clear your hip bone.
Outside the Waistband under a cover garment (OWB)
Great comfort at home or with reliable cover.
- Pros: Very comfortable, easy reholster, stable.
- Cons: Harder to hide; wind or movement can flash the holster.
- Tips: Use a longer shirt or jacket and a holster with some inward cant.
Shoulder holster
Useful when you sit a lot or wear jackets daily.
- Pros: Good for driving, spreads weight, spare mag on the other side.
- Cons: Needs cover layer, careful muzzle discipline needed when drawing.
- Tips: Train with a coach to manage safe draw paths.
Pocket carry
Ideal for small guns and light summer clothes.
- Pros: Simple, deep concealment, hand can rest on grip without flagging intent.
- Cons: Slow draw when seated, limited gun size, needs stiff pockets.
- Tips: Use a real pocket holster. Keep that pocket empty of all other items.
Ankle carry
A backup option or for medical or office settings.
- Pros: Good when waist carry is tough, deep concealment.
- Cons: Slow draw, tough while moving, dust and lint exposure.
- Tips: Best for small, lightweight guns and boot-cut pants.
Belly band and wrap holsters
Flexible fabric rigs for workouts or non-belt clothes.
- Pros: Works with leggings or gym wear, modular spots.
- Cons: Less rigid; must confirm trigger protection and stability.
- Tips: Choose models with a hard trigger shell and sweat-wicking fabric.
Bra, corset, and thigh holsters
Body-specific options that can work well with dresses.
- Pros: Outfit-friendly, deep concealment.
- Cons: Draw can be complex; fit matters a lot.
- Tips: Train the draw with safe tools and test while wearing your real clothes.
Off-body carry (bag, purse, sling, chest pack)
A last resort due to access and retention risks.
- Pros: Works in non-permissive clothing, spreads weight.
- Cons: Bag snatches, slow access, easy to leave behind.
- Tips: Use a bag with a dedicated, zipped gun pocket and a retention strap.
I rotated through all of these over my first two years. My biggest lesson was this: the holster and belt matter as much as the position. With the right setup, even tricky spots can feel safe and smooth.

Holsters, belts, and gear that make carry safer
The gear you choose can transform any spot in this complete guide to concealed carry positions.
- Holster material: Kydex holds shape and allows safe one-handed reholstering. Leather can work if stiff and well-made.
- Trigger guard: The trigger must be fully covered. No exceptions.
- Retention: Passive click retention is fine for most. Test the shake test over a soft surface.
- Cant and ride height: A small tweak can fix comfort and printing. Start at 15 degrees for strong-side and neutral for appendix.
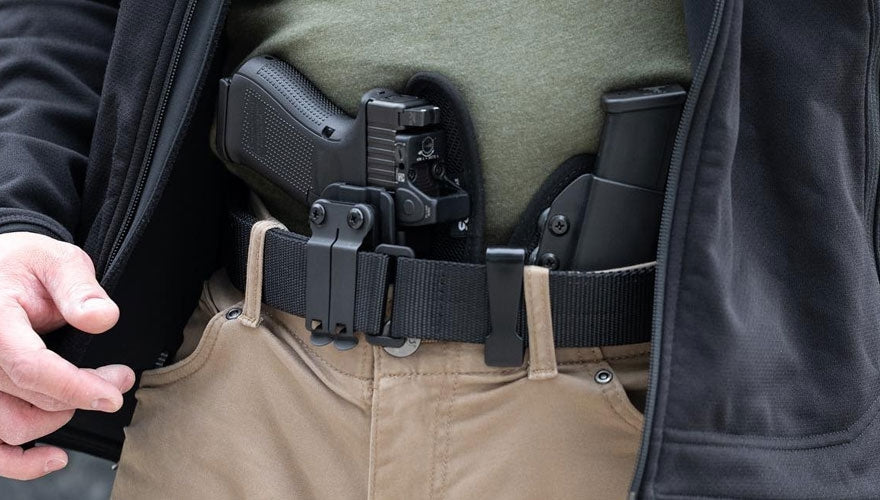
- Wedge and claw: A foam wedge tips the muzzle out and the grip in. A claw pushes on the belt to hide the grip.
- Belt: Use a stiff, purpose-built belt. It spreads weight and stops sag.
- Optics and lights: Pick holsters made for your optic or light. Make sure nothing can press the trigger during holstering.
- Spare magazine: Carry one if you can. It helps fix malfunctions and increases confidence.
In this complete guide to concealed carry positions, I stress one rule: buy once, cry once. Cheap gear costs more when you end up replacing it.
Fit, body type, and wardrobe tips
Body shape, posture, and style all affect the right spot. This complete guide to concealed carry positions leans on simple tweaks that work fast.
- Curved lower back: A wedge helps at appendix. A bit more cant helps at 3–4 o’clock.
- Short torsos: Lower ride height reduces poke under ribs.
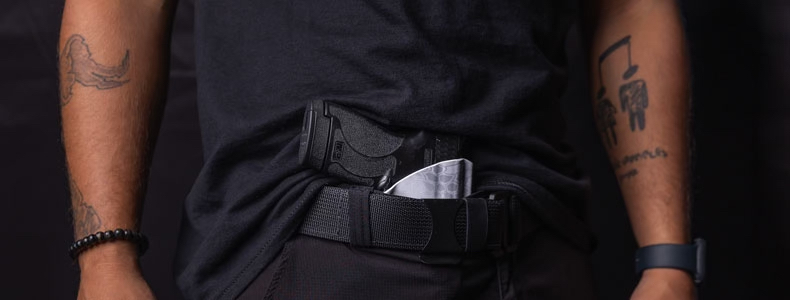
- Athletic builds: Grips print more under thin shirts; patterns and darker colors hide better.
- Larger midsection: Try strong-side IWB with forward cant, or use an appendix wedge and shorter barrel.
- Business dress: Consider tuckable clips or a slim appendix rig with a tucked shirt.
- Hot climates: Light cover shirts, open button-downs, or a purpose-made chest pack for hikes.
Try a “mirror loop”: walk, sit, tie your shoes, and stretch. If it hides through that loop, you likely have a winner.
Comfort and health on long days
Carry should not hurt. This complete guide to concealed carry positions focuses on small fixes that add up.
- Pressure points: Add a soft wedge, adjust ride height, or shift a half inch.
- Nerve hotspots: If you feel tingles, stop and adjust. Pain is a signal, not a price.
- Heat and sweat: Use a sweat guard and moisture-wicking undershirt. Clean gear often.
- In the car: Set your seat for a little more tilt. Avoid unholstering in vehicles. If access is blocked, adjust cant before you drive.
- Daily life: For hugs, turn your strong side away or use a “shoulder blade” hug. In restrooms, keep control of the holster and belt at all times.
In my first summer, I battled hot spots at appendix. A one-dollar foam wedge and a thin undershirt solved 90% of it. Small tweaks make big wins.

Training, safety, and practice plans
Skills beat gear. This complete guide to concealed carry positions keeps training safe and simple.
- Follow the four rules of firearm safety, always.
- Dry practice: Unload in a separate room. No ammo in the practice space. Use a timer and a safe backstop.
- Start slow: Perfect the path. Speed comes from clean reps.
- Reholster slow: After a string, breathe, look the gun into the holster, and clear clothing with your thumb.
- Use a training gun: A blue or inert gun helps you learn the draw with zero risk.
- Get coaching: A qualified class compresses years into days and builds safe habits.
Build a short weekly plan: five minutes of dry practice, three days a week. One range session each month to confirm hits and gear.
Legal and ethical basics for responsible carry
Laws change by state and city. This complete guide to concealed carry positions is not legal advice, so check your local rules before you carry.
- Licensing and reciprocity: Confirm where your permit is valid and where it is not.
- Sensitive places: Know restricted locations like schools, federal buildings, and posted private property.
- Duty to inform: Some states require you to inform law enforcement during stops.
- Brandishing: Do not expose or handle your gun to scare. Keep it concealed and under control.
- Use of force: Learn the basics of imminence, ability, and reasonableness for self-defense.
- Secure storage: Use a lockbox at home and in vehicles to prevent unauthorized access.
Ethical carry means low profile, high care, and a calm mind. The goal is to avoid conflict, not to win one.
Common mistakes and simple fixes
I see the same errors often. This complete guide to concealed carry positions shows quick cures.
- Flimsy belt: Upgrade to a stiff belt. Printing and discomfort often vanish.
- Holster that collapses: Switch to a rigid holster to reholster safely.
- Constantly changing positions: Pick one and train it for a month.
- Touching the gun in public: Do a quick clothing check in private before you leave.
- Ignoring fit: Small changes in cant or height can fix pain and printing.
- Fast reholster: Slow down. No one ever won a prize for fastest reholster.
Buying checklist and budget advice
Use this simple list to save time and money. In this complete guide to concealed carry positions, smart buys beat impulse buys.
- A quality kydex holster for your main spot, with proper cant and ride height.
- A second holster for a backup or different outfit if needed.
- A stiff gun belt sized for your waist and gear.
- A wedge and claw kit for appendix if you need more concealment.
- A small lockbox for home and vehicle storage.
- Return policy: Buy from brands with trial windows. Test at home first.
- Buy used from trusted sources when safe. Many carriers sell barely used gear.
Set a test week for each setup. Wear it at home for hours. If it fails comfort, safety, or concealment, send it back.
Frequently Asked Questions of complete guide to concealed carry positions
What is the safest concealed carry position?
The safest position is the one that uses a rigid holster, covers the trigger, and keeps the muzzle off your body as much as possible. Strong-side IWB and careful appendix carry with good gear are both safe when trained and mindful.
Is appendix carry really safe?
Yes, with a quality holster, strict trigger discipline, and slow, careful reholstering. Many trained carriers use AIWB daily with no issues.
How do I stop printing under a T-shirt?
Add a wedge and a claw, adjust cant and ride height, and use darker colors or patterns. A stiffer belt also pulls the grip in and reduces the outline.
What position works best for bigger bodies?
Strong-side IWB with forward cant often feels better, and appendix with a wedge and shorter barrel can also work. Test both at home and move a half inch at a time.
Can I carry while driving?
Yes, but set your seat, tilt, and cant for clear access first. Avoid unholstering in the car; adjust your carry before you start driving.
Do I need a special belt for concealed carry?
A stiff belt makes a huge difference in comfort and concealment. It supports the holster, reduces sag, and helps keep the grip from printing.
What is the best holster material for daily carry?
Kydex is durable, rigid, and keeps the mouth open for safe reholstering. Quality leather can work if it is thick, stiff, and well-fitted to the gun.
Conclusion
You now have a clear path through a crowded topic. You learned how to pick a spot, test it, tune it, and train it, all within a complete guide to concealed carry positions you can trust. Small changes in holster, belt, and fit often make the biggest gains in safety, comfort, and concealment.
Make a choice today. Score your top two positions, run a two-week home test, and book a solid class. If this complete guide to concealed carry positions helped, share it with a friend, subscribe for more deep dives, or drop your questions in the comments so we can learn together.